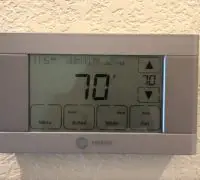
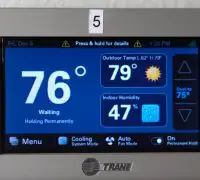
Modern thermostats come with many features, and the ability to program them is a leading one to name. Another feature that attracts clients these days is their ability to connect to the Internet through a Wi-Fi connection or an Ethernet cable.
If your Trane thermostat fits this picture, you will want to be able to get the most out of it. Picking up the phone, opening the app, and changing the temperature before returning from your miles away vacation can be done. Connect your Trane Thermostat to Google Home.
Page Table of Contents
How to connect Trane Thermostat to Google Home
Most modern thermostats come with their apps, but you can also connect them to Alexa, Google Home, and other smart-home apps. When the thermostat is connected to the Internet, you gain access to weather radar, 5-day forecasts, and severe weather alerts. You will also be able to use motion-sensing technology and GeoFence. The technology enables the thermostat to sense when you’re home and to cool or heat the house accordingly.
Thanks to Google Home, you can control your Wi-Fi-enabled thermostat and manage the household without leaving the room or being at home. It’s energy and time-saving.
Notes
To connect your Trane thermostat to Google Home, you will need to have several things:
- You must have Google Home
- You must have a Google account
- You must have a smart wireless thermostat
Steps to take
As with many procedures, you need to follow specific steps to connect your wi-fi thermostat to Google Home:
- Open the Google Home app
- Look for the button in the top left corner of the screen and tap it
- Continue by tapping Home Control
- In the bottom right corner, you will see a “+” sign and you need to tap it to add your thermostat
- You need to tap the name of the provider you will use to connect the thermostat
Smart Things
- Enter your account details and tap login
- Choose the thermostat you want to connect to your Google Home and tap Authorize
Thermostat Identification
Being organized is key to success, whether using your wi-fi thermostat or creating a project for the job. You can name the rooms or thermostats to control the temperature efficiently.
- Go to the Devices tab and look for the thermostats connected to Google Home.
- Pick the thermostat you want to name
- Tap the Set a nickname option
- Type in the nickname (Downstairs, for instance)
- End by tapping OK
In the Device details option, you can now see the new name for your thermostat. It’s an effortless way to identify the device with Google Home. Google features a list of simple commands that you can use to control the temperature nicely and easily with your voice. Additional setup instructions are also available.
Note
If you have several thermostats, specific commands will apply to all. For instance, a command such as “Set the Temperature to 75 degrees” will modify the temperature on all thermostats. If you want to change the temperature on a specific thermostat, you will need to use its name, i.e., Downstairs Thermostat.
Auto mode (heat-cool Mode)
When the thermostat is in Auto Mode (Google names it “heat-cool” mode), setting the set point differs from other modes.
With Auto Mode, you have two set points: one is for heating and the other for cooling. Auto Mode is widely used in climates where day temperatures fluctuate significantly from night temperatures. As a result, the thermostat will automatically cool or down the house once the inside temperature reaches a set point.
Since Auto Mode consists of two set points, Google Home won’t know which one to modify when giving the command “Set temperature to 75”. Therefore, it will change the heat setpoint to 71degrees and the cooling setpoint to 79degrees. The system uses a 75 temperature setting as the mid-point of cooling and heating ranges.
When you want to modify just one of the setpoints and command a specific temperature, you will need to use the command structure “Set <thermostat name> cooling to <temperature>.”
