Modern furnaces come with many components that ensure accurate operation. However, the elements take intense use, so the risk for issues is never null. Sometimes, the parts are beyond repair, and replacement is the only solution. To ensure that your furnace remains in perfect condition, you will have to address any problem with the control board right away (or any other component for that matter).
Page Table of Contents
How do you know that the control board has to be replaced?
Once the control develops problems, it\s only a matter of time until you need to replace it, Control board replacement for Bryant furnaces ranges from $100 to over $400 for high energy-efficient models. Here are the signs telling you that the control board should be replaced soon enough:
Warning lights
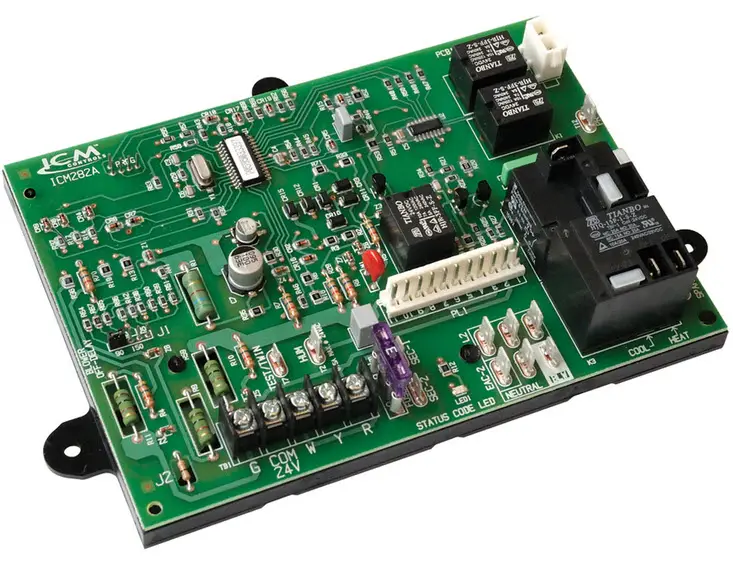
Control boards come with LED indicators that work as warning lights. Red lights are always worrying, so call the HVAC technician for further investigation.
Interruptions in the process
The furnace control board follows a specific order of events. The first step should be to turn on the induced draft motor, and the pressure switch should close in the next phase. When the ignition didn’t occur, or if the blower won’t stop operating even when all other things ceased to work, you should call the HVAC technician.
Temperature fluctuations
If the temperature inside fluctuates a lot or if you’re feeling too cold or too hot, the furnace may have developed problems, especially if the thermostat seems to be working just fine.
When you observe any of these symptoms or question the proper operation of the control board, you should talk to your HVAC technician to repair the control board. It’s a complicated component of your furnace, so only professional may address fixing.
Why does the control board on your furnace may fail?
Several causes make the furnace’s control board so take a look at the possible reasons:
Clogged filters
Dust and debris clog the filters, making the furnace’s blower motor overheat.
Loose wires
As the vibration is intense with the furnaces, it’s a matter of time until the wires start to loose. Short and failure of the circuit board can also happen because of loose cables. If that’s the case, the technician may repair the control board so that replacement won’t be necessary.
Wrong or dirty fuse
When the fuse is too small or wrong for the furnace or hasn’t been cleaned for a long time, the circuit board will fail.
How should you replace the control board on your Bryant furnace?
Always make sure to buy the exact control board model as the current one you have on your furnace. You will have to take two main steps for replacing the control board: removing the current control board and mounting the new one.
Remove the current control board.
You must always be cautious when working with electrical components. Put labels on all wires before disconnecting them for effortless installation late on. Wiring mistakes can lead to incorrect and even dangerous functioning. Here are the steps to take for removing the current control board.
- Begin with switching the thermostat off. Make sure to set the temperature to the lowest setting as well. Also, you have to switch off power to the furnace.
- Switch off the gas supply to your furnace. Always turn off the gas and electrical supplies to your furnace, installing a lockout tag before servicing or addressing issues on your furnace.
- Remove the control access and blower door if you have an 80% furnace. If it’s a 90% and up model, you need to put aside the outer door assembly, removing the screws from the blower access panel. Could you place them in a safe place?
- Continue with detaching the humidifier wires and thermostat. It would help if you also disconnected the blower, line voltage, EAC, and transformer wires.
- If you have an 80% model, you have to retain the retaining screws and the control board from the bracket. The 90% models will require removing the screws from the blower deck, securing the control box assembly. Take out the retaining screws from the board, and put aside the board from the control box assembly.
- You will need to put aside the wiring harness connectors from the control board.
- Examine the control board to see if there are any water stains. If you notice water leakage (evaporator coil, humidifier, vent system) into the control area, make sure to solve it.
Mount the new control board
You will need to carefully follow the steps for installation to stay safe and don’t install it incorrectly.
- Begin with grounding yourself, managing the control board by edges
- If necessary, you will have to put the board’s tab(s) into the control box’s slots.
- Mount the new control board’s retaining screws. You also have to mount the wiring harness adapter to three connections of the current wiring harness.
- Attach the other end of the adapter harness to the new control board
- Continue with connecting the transformer to the new control board.
- Attach the furnace’s black wire from the auxiliary junction box to L1 on the new control board. The L1 is typically found on the blower enable relay.
- Attach the white wire from the auxiliary junction box to one neutral spade connection placed in front of PL1.
- You may now connect the blower motor leads to the new control board.
- Make sure to connect all accessory wires too.
- If you have a 90% furnace, you have to reinstall the control box assembly to the blower’s deck.
- Establish blower off delay. The blower off delay jumper select is found on the top-center area of the board. It’s set at 120seconds from the factory.
- Mount the new wiring diagram over the current wiring diagram.
- Always connect thermostat wires to the control board after start-up and system checkout are complete.
How do you run a system checkout?
Being meticulous when working on your furnace is fundamental for proper operation. Here are the steps to take to ensure that you properly replace the new control board:
Step 1- Component self-test
Here are the steps to take:
- Begin with ensuring that the thermostat is turned off/thermostat wires aren’t attached. Switch the power on and shut down manually the blower door switch. Use a tiny piece of wire and a short TEST/twin terminal to Com/24V terminal. Here’s the component test sequence:
- Status LED has to flash four times before you switch On the inducer motor.
- The Inducer motor will operate throughout the whole component test.
- The hot surface igniter will stay On for 15 seconds and switch off afterward.
- The blower motor HEAT speed remains on for 10 seconds.
- The blower motor COOL speed will be switched on for 10 seconds.
- If the self-test reveals that some components don’t run correctly, you should repair or replace them. Remember that the gas valve will not be energized throughout the self-test
- Switch off the power
- You should release the blower door switch. Once the blower door is removed, the current status code will be deleted.
- Attach the thermostat wires
- Mount the access doors and blower
- Switch on the power again
- Switch on the gas supply to your furnace
Step 2- Flame sensor operation
You will need to attach a DC microammeter in series with the flame sensor. Begin a request for heat. Once the burners ignite and stabilize, you will have to check the flame current. Nominal flame current should range from 4.0 to 6.0 microamps DC. Should the flame current be below 4.0 microamps DC, you need to take out and clean the flame sensor with some fine steel wool. Replacing the flame sensor could also be necessary. If the flame current goes under 0.5 microamps DC, the furnace control will lockout.
Step 3
Ensure that you go over all safety checks required for system operation. Make the furnace run throughout one whole request for heat cycle to see if everything works correctly.


