If you're looking to fix or replace your Heating or A/C system, we can connect you with a reliable and cost-effective professional in your area.
Even tankless water heaters don’t require much maintenance, cleaning them once a year is going to expand the lifespan and reduce the risk for corrosion.
Truth be told, the water only runs through a tankless water heater, so it doesn’t have time to affect the water heater. However, the risk for buildup is never null, especially if you live in an area with hard water.
What’s the proper way of cleaning Navien tankless water heaters?
In order to have your Navien tankless water heater up and running for a long time, you need to take care of it any now and then. Keep in mind that maintenance depends a lot on your location, the installation, the frequency of use, and the performance of your unit altogether.
It’s essential to follow the steps so that the cleaning process is productive and successful.
1. Take a look at the gas line
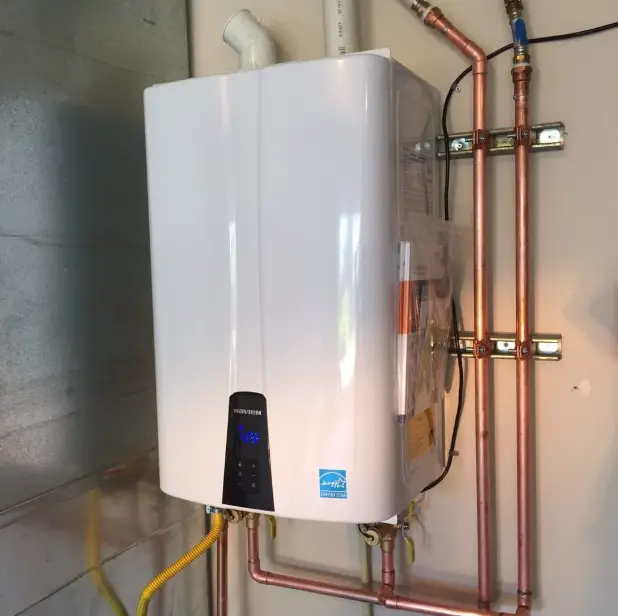
Check the gas line and follow it all the way in the back of your heater, turning it off. Typically, the gas line starts in the front and goes all the way in the end. Check the manifold, taking the handle for making it cross with the pipe.
2. Turn the power off the unit
Look for a red button on the bottom of your water heater. Press and hold it for a couple of seconds to powering off the water heater.
3. Continue with turning the water off
Now it’s time to turn the water off, which is typically right below your Navien water heater.
4. Take the cover off
You have to take the cover off your unit so that you remove the cold air filter. Most of the time, you need to unscrew four screws: two at the top of the water heater, and the other two are placed at the bottom. Take the cover and lift it off, putting it aside.
5. Unplug the power to your Navien water heater
6. You need to remove &clean the cold air intake filter
It’s essential also to clean the cold air intake filter. It’s where bugs, insects, and debris may collect. There should be a screw at the front left at intake housing. You only need to loosen it a bit. There’s another screw at the front of the filter; remove it and slide the screen out afterward. Get a dry toothbrush for cleaning the filter. Put it back in place once it’s clean. Don’t use a wet toothbrush as you’re only going to stick debris better to the filter.
7. Re-insert the filter, putting it back in its slot. Slide it back in place so that the screw holes are lined up and match. Screw the filter back in.
8. Now it’s time to drain the water heater, operating several valves. Here’s how to do it right:
- Turn off the cold water inlet valve and the hot water valve too. they isolate the water heater and need to be off for the moment
- Look for the smaller pipes (a red and a blue one). They’re the “service valves,” and you have to remove the caps off.
- Hook the hoses up to the service valves, opening them so that the water heater can drain into a bucket.
- When the hoses are connected, you may safely open the valves. Let them drain for a couple of minutes until no more water comes out.
9. Clean the base of your Navien unit.
You have to take the cold water filter off (right to the cold water isolation valve). Open it carefully, placing a bucket under it. Some water may come out at times. You may notice some residue on the filter, brown discoloration, and even some garbage. Use the toothbrush to clean it gently.
10. Place the filter back on. You can tighten it manually and adding 1/8th of a turn with your tool.
11. Manage the “dirt-trap.”
Look for a pin under your water heater and pull it off entirely. Pull the traps straight down (it should have an O ring on it). The o-ring should be placed on the first layer. Probably you’re going to notice some dirt inside. This time, you should clean it with some water.
Put the ring back on and the holding pin.
12. De-scaling the water heater
You need to run white vinegar through the system, pulling the scaling out of the inside of your water heater.
- Pour two gallons of white vinegar into a 5gallons bucket.
- Get a sump pump and connect the cold service hose to the sump pump.
- Set the pump in the bucket and plug it in. Make sure that the return side will point into the bucket.
- Pump the white vinegar into the cold side, up through your water heater, and out the hot side.
- The large valves should be in the “off” position, whereas the service valves should be in “on” place.
- Let the vinegar cycle through the cold side for 45 minutes.
13. Flush the system
You start by turning the service valves off and removing the hoses.
- Connect a regular garden hose to the hot side service valve. You may damp it into a bathtub, pushing the water through the isolation side on hot.
- Open the service port on the host side and the isolation valve on the cold side, pushing water through the system. It should come out of the hot water port.
- Flush the vinegar out of your water heaters
14. Take the service valve on the hot side and turn it off.
15. Remove the service hose and recap the service ports on the hot/cold side. You should leave the service ports on “off” positions.
16. Turn the water on to your water heater
17. Turn the hot water on
18. Place the cover back on
19. Turn the gas back on
20. Press the power button. You’re all done now!
We can definitely connect you with a trusted provider in your area to repair, replace or maintain your heating and A/C systems. Why not let us find a professional for you?


